When utilizing computers operating on Windows 11, you encounter numerous repetitive tasks daily, including browsing and using various work applications like Slack, video conferencing tools, Microsoft Office suite, and more. Windows 11 is tailored to streamline these tasks and boost productivity by automating daily processes, enabling your computer to execute certain tasks automatically upon startup, eliminating the need for manual intervention. Task automation extends beyond productivity tasks; you can also automate activities such as scheduling computer shutdowns at specific times. This article explores how to automate tasks in the Windows 11 operating system using the integrated Task Scheduler tool and Microsoft's Power Automate application.
Automating Daily Tasks in Windows 11
In the daily use of Windows 11 or Windows 10 operating systems, users often find themselves engaging in repetitive tasks. Upon computer startup, users commonly launch specific applications such as web browsers and may run multiple programs simultaneously, such as Slack, Teams, and Microsoft Office.
To increase productivity and save time, automating these tasks to execute automatically upon computer startup is something worth considering.
How to automate tasks using "Task Scheduler" in Windows 11
The best way to automate tasks in Windows systems is to use the built-in task scheduler, which gives you the ability to create tasks that run at specific times in your device. Here's how to use this tool...
- Open the Task Scheduler:
- Open the Start menu in Windows.
- Find the Task Scheduler.
- Choose the respective search result.
- Create a core task:
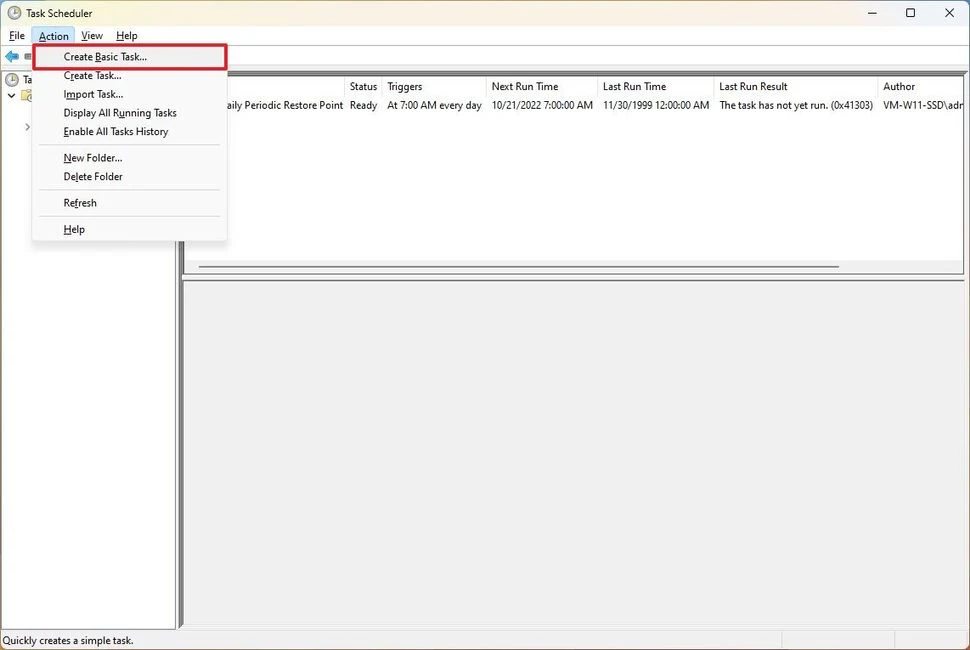
- In the open window, go to the Actions section in the sidebar.
- Click on the "Create Basic Task" option.
Type a short descriptive name for the task, for example, Notepad Launcher, in the Name field.
- Determine implementation time:
- Click on the "Next" button.
- Set the time required to execute the task, such as daily, weekly, monthly, once, when the computer starts, when I log on, when a specific event is logged.
- Click .. Next.
- Determine when and when the task should start using the Start setting.
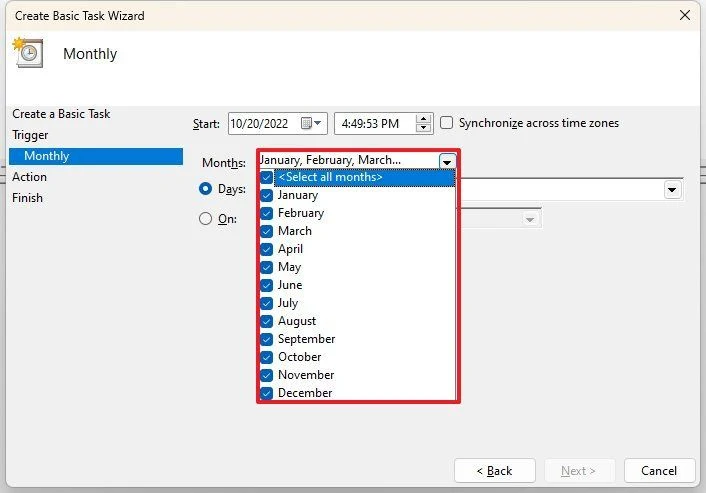
- Select the months of the year to run the task using the Monthly drop-down menu.
Select the days on which the task will run using the "Days" or "on" drop-down list.
- Define action:
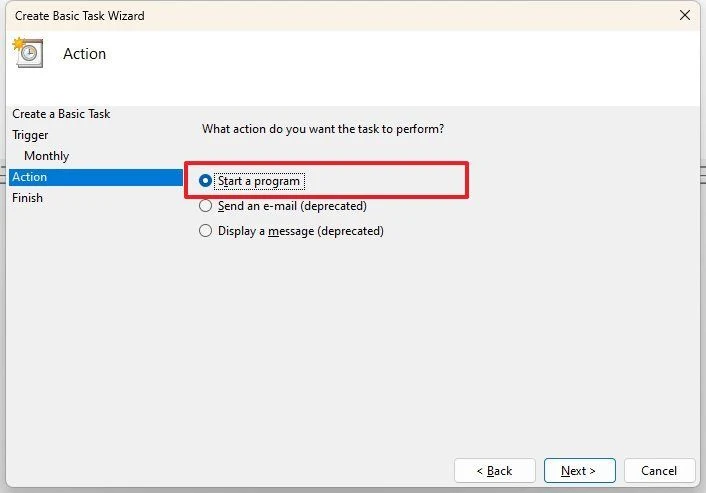
- Choose the type of task you want, such as Start a program
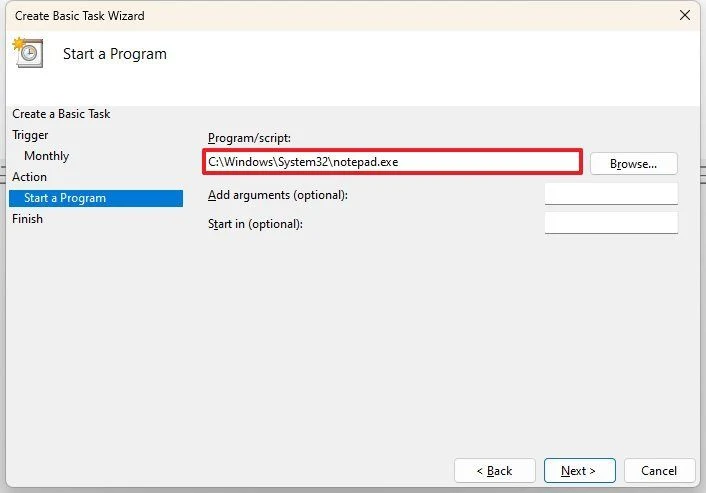
- Select the path of the program to run.
- Review and save the task:
- Click the Next button.
- Specify the application path in the Programme/Script field. If you don't know the path of the app, click the Browse button to find it.
- Click "Next" to review the task summary.
- Click "Finish" to save the task.
- Task management:
- Go to the "Scheduled Task Library" section to see all tasks.
- You can delete or disable tasks as needed.
Automate tasks in Windows with "Power Automate"
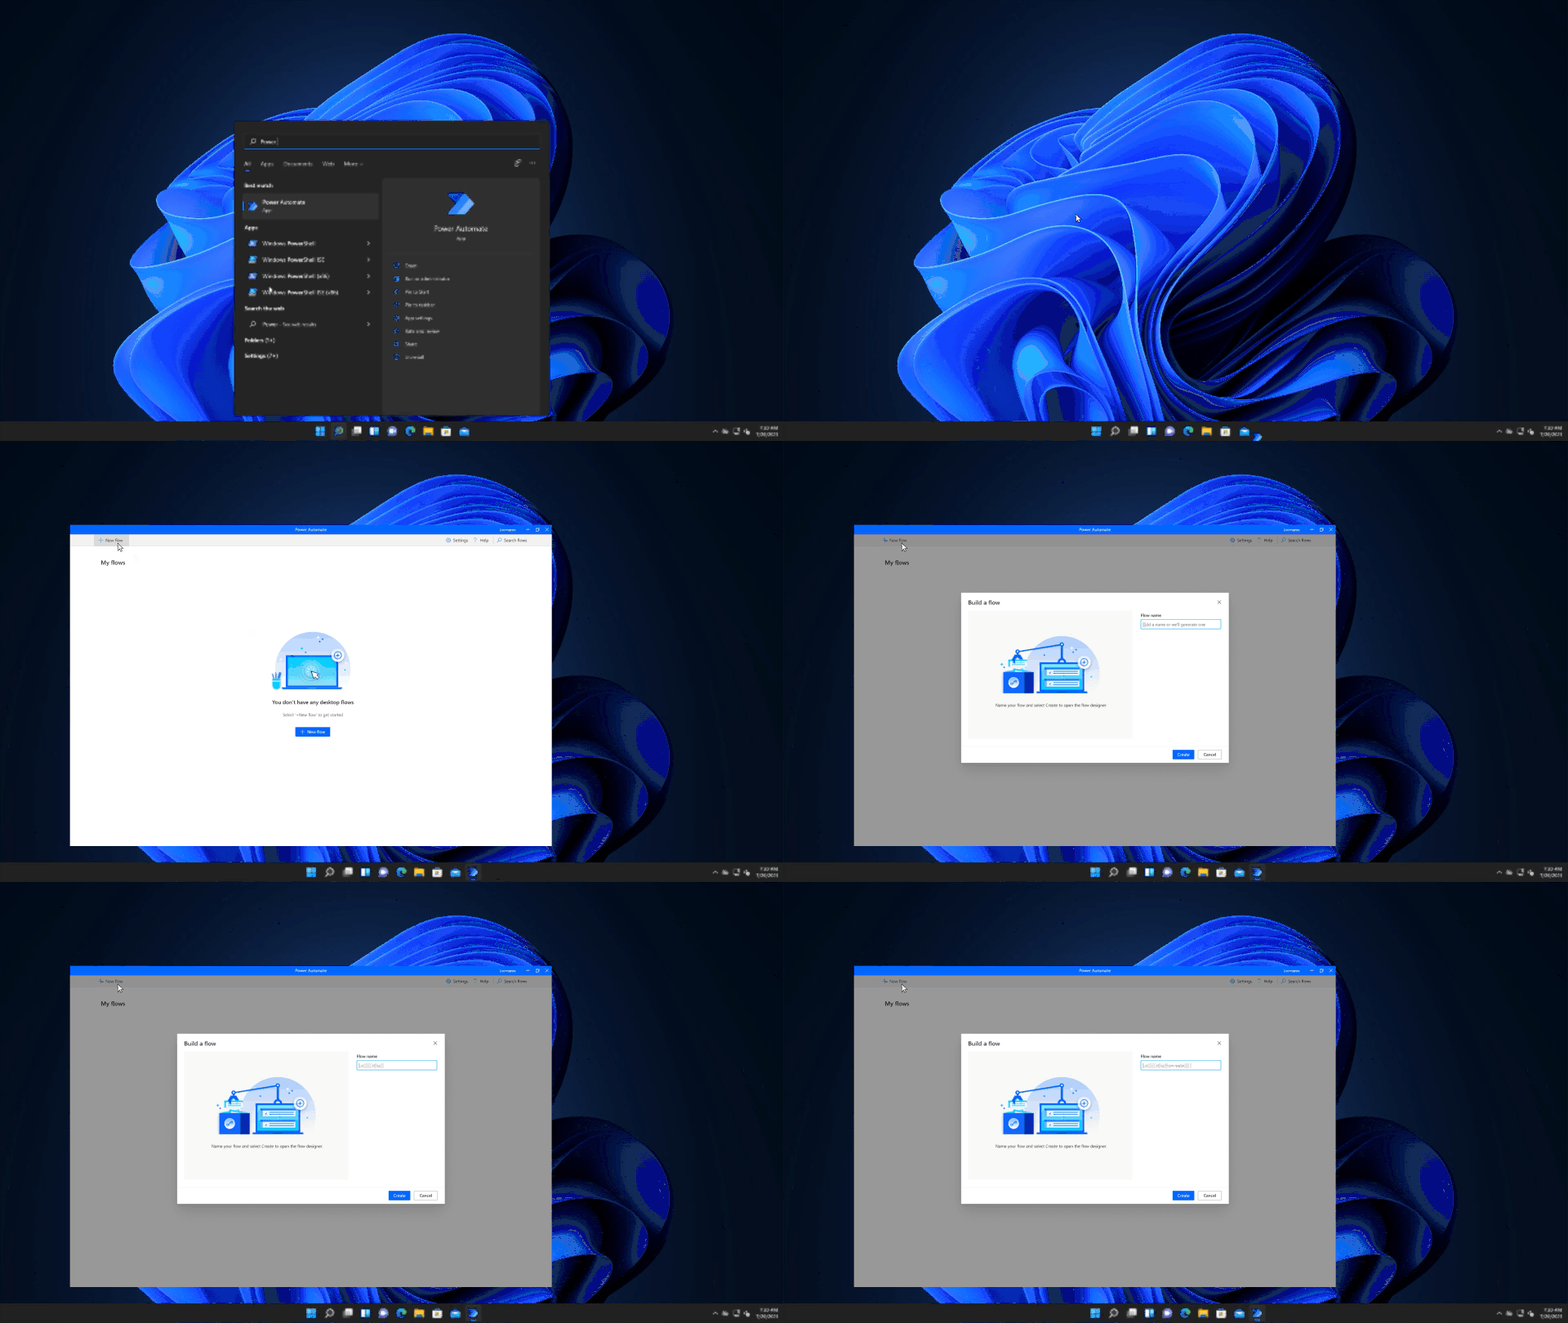
Power Automate is a powerful task automation tool in Windows, produced by Microsoft. You can easily install it on your computer and start using it in a similar way to the built-in task scheduler in Windows. To get started, you must follow these steps:
1. Visit Microsoft's official website in your web browser and download the Power Automate app.
2. After installation, log in with your Microsoft account.
3. Explore the examples provided in the Examples section to understand how to use Power Automate.
4. Take advantage of the "Desktop Automation" option for tips on getting started with the app and customizing tasks.
5. Click on the pen icon next to any task to start and customize the automation process.
6. Edit the task and customize the steps to your needs.
7. After completion, save the task using the "Save as" option.
8. You will find all the tasks you have created under the "My flows" section on the Power Automate app homepage.
These were two ways to automate tasks on your Windows-powered computer.


